Anyone that’s been online as long as I have (and yes, there are many that have been online for far longer) knows that your passwords getting leaked and compromised isn’t a question of “if” but rather a question of “when”. As we continue onward in the online world, it’s critically important now more than ever to have a strong password policy and to actually enforce your strong password policy! I italicized the last bit as this will be the crux of this entire article as I experienced a password breach for the first time.
Comments closedCategory: Security
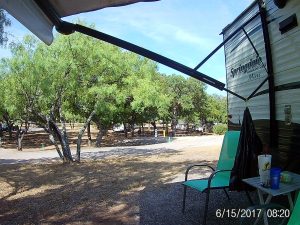 In this article, I’ll be going over my setup for being able to join my camper’s wireless network to a host wireless network (RV park wifi, state park wifi, etc..) with the purpose of maintaining security and convenience between switching wireless networks. Even though you’re on-the-go, you shouldn’t sacrifice security for convenience of park wifi, and at the same time, changing the wireless configuration on a slew of devices is inconvenient at best and maddening at worst. First I’ll cover why you want to consider this method versus other methods, then I’ll itemize a product list, then finally we’ll jump right into configuration. When we’re done, you’ll have your trusted wireless network all set up and ready for your devices.

After publishing the last post on networking and the security series, I felt it was necessary to go ahead and publish a piece on building a custom router. I have been a fan of pfSense for the past four years and swear by it. It has the ease of use of a commercial GUI-driven router and unrivaled flexibility limited only by the hardware it is installed on. In this howto article, we will cover installing pfSense on an embedded platform and initial configuration for getting your router up and running.
9 Comments
 In this final article in the three part Ubuntu IDS series, we will go over installing, compiling and configuring Snort and Nessus on our new IDS device. We will use Snort to analyze traffic as seen by the IDS and we will use Nessus to perform vulnerability testing on the network. The process for installing Snort will also cover installing SnortReport provided by Symmetrix Technologies so we can translate Snort’s cryptic messages into a more readable format that we can take action on. Read on as we wrap up the installation and finish our IDS device.


In an earlier article, I demonstrated how you can build a passive monitoring device for an Ethernet network as the first part to a three part project to build a home IDS device. In this article, the second in the series, I will describe how to set up the networking for an IDS using the passive tap that I built earlier.This setup will involve using a technique called bonding to take two physical interfaces and bond them together, creating a logical interface that we can use for Snort. This article will also explain where is the best location to place the tap and what you can expect to see once the networking is set up using common Linux utilities like tcpdump.
2 Comments

One of the things that the GCIA study has taught me is that being able to monitor the network your computer is on is a critical necessity to maintaining a secure network. Corporate environments can set up IDS devices to monitor traffic however monitoring doesn’t work unless you have proper connectivity to what you want to monitor. Unfortunately, most of us don’t have central wiring in our house and expensive managed switches that can set up span sessions with which to monitor traffic in transit. In this HOWTO, I will cover how to build your own monitoring connection that you can use on your own network to monitor traffic without breaking the bank. This article is first in a three part series on how to build your own home IDS for monitoring your network traffic. Look for the other two sections soon!
13 Comments