Networking: Installing and configuring pfSense Embedded
by firestorm_v1 on Nov.11, 2011, under Embedded devices, How-To's, Networking, Security, Software

After publishing the last post on networking and the security series, I felt it was necessary to go ahead and publish a piece on building a custom router. I have been a fan of pfSense for the past four years and swear by it. It has the ease of use of a commercial GUI-driven router and unrivaled flexibility limited only by the hardware it is installed on. In this howto article, we will cover installing pfSense on an embedded platform and initial configuration for getting your router up and running.
First, an introduction to pfSense
PfSense is a lightweight FreeBSD based distribution geared towards router and firewall installations. It has been around since 2004 when it was forked from the m0n0wall project and has since turned into an excellent stand-alone distribution for routing and firewalling. Although pfSense is generally intended towards full-PC installations, they offer an embedded image for use without skimping on the features. pfSense is well known in the Linux/Unix/BSD community and is very highly regarded for both it’s feature set and it’s flexibility.
A question I get asked a lot is “Why pfSense? Why not just buy a Linksys?” The answer is about hardware and software. While I do own a couple of Linksys routers and do admire Linksys for bringing NAT devices to the common user, their hardware is restrictive and is only usable in the standard configuration (1 WAN and 4 LAN/WIFI) Even though it has been proven several times that the hardware they use for the LAN portion can support advanced features like VLAN support, bridging, multiple interfaces/IP’s, they will never release this functionality to those that want it and will instead force the advanced user to look elsewhere. In Linksys’s view, the router dictates the network. With pfSense, I can build a custom configuration however I deem fit, with multiple NICs for WAN and LAN, with custom configurations and with VLAN support. Not to mention that “stock” pfSense even supports DHCP, Captive Portal (like “free wifi”) , DNS, VPN support, Fail Over mode and many other options that Linksys wouldn’t ever make available. Even if I never use VPN support or use the Failover mode, it’s nice to know those features are there should I ever need them.
Hardware Requirements:
In order to use pfSense Embedded, you will need a computer that adheres to the below spec. Of course more is better, but these are the minimum specs as posted on the pfSense website.
- CPU: 100MHZ x86 Pentium or equivalent.
- RAM: 128 MB RAM
- Serial Port
- 512MB Flash storage or 1GB hard drive
- Two Network Adapters (NICs)
Please note that some of the advanced features like VPN support, Captive Portal and some high-bandwidth connections may require faster processors than what is outlined below. If you want to make sure your embedded platform matches spec, take a look at pfSense’s hardware sizing guide which covers some of the items more in depth.
A note on storage:
The pfSense distribution comes in two flavors. You have the “desktop PC” version for full-size computers with a CD ROM and a hard drive, and you have an “embedded” version which is for devices without a CDROM or hard drive and use some method of flash storage. While you may be able to install the desktop PC version on the embedded device, it is not recommended as the distribution will be tailored for running on a hard drive, not a solid state memory device. If you intend to use a hard drive, install the PC version.
You can use any IDE device for storage as long as it is recognized by your computer’s BIOS and is supported by FreeBSD. I have not had a problem with either of these two stipulations, so you should not have any problems with it. One thing to consider is the use of an IDE to CF adapter like this one on Newegg. This particular device fits right into the IDE header on the motherboard and allows you to use a Compact Flash cartridge as an IDE hard drive which is perfect for installing and running pfSense. The router in my home is a slightly different model, but is running on a Sandisk 4GB CF cartridge and has been doing so for the last two years without fail.
My hardware:
In this howto, I will be using a Transcend 1GB IDE solid-state device that I got on Ebay. This device plugs into the 40 pin IDE header and mimics a standard hard drive. It is fast and will definitely get the job done. The hardware I will be using is a set top box device I scavenged from a computer show a long time ago. It has a 233MHz Cyrix processor , 512MB RAM, an onboard serial port, an IDE port, an onboard NIC and a single PCI riser slot where I will be installing a dual 10/100 Intel NIC.
Getting Started:
If you are using the CF to IDE adapter mentioned earlier, you can use a USB-CF reader and an application to burn the image to the CF cartridge.
In order to proceed, you will need the following items
- A Linux based computer with one free IDE port
- An IDE-CF adapter with an appropriately sized CF card minimum 512MB, recommended 1GB, referred hereafter as flash cartridge.
- The “target system” that will ultimately run pfSense with at least two NICs.
- A third NIC (optional, for guest network, discussed in the “Advanced” section below).
- A serial cable (Female to Female) and a Null Modem Adapter.
- A pocket switch with a small patch cord.
Identify your Flash device
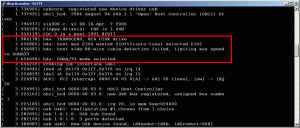
First, attach your flash cartridge to your Linux PC and boot it. Make sure that it boots your Linux distribution first and does not attempt to boot from the flash cartridge. Once booted, login as root and run dmesg. Look for the /dev entry for your flash module. You may be able to look for the manufacturer name as is the case in my output below:
In the output above, my Transcend module was recognized as hda (primary master HD), so my /dev entry is /dev/hda. We will need this later on to burn the image.
Download, validate, burn:
Now that we know what device we need to burn to, it’s time to get the image. Head on over to the pfSense Mirror selection page and pick a server that’s closest to you.
You should then be presented with a list of images named pfSense-1.2.3-RELEASE-XXXX-nanobsd.img.gz where XXXX is a choice of 512mb, 1g, 2g and 4g images. In my particular case, I will be using pfSense-1.2.3-RELEASE-1g-nanobsd.img.gz as it is pre-built to a 1gig flash cartridge.
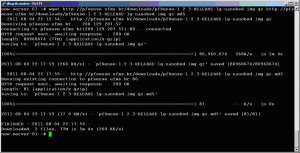
Use wget to download the image along with the accompanying .md5 file as shown in the sample output below. Note: URLs in the below image may differ depending on the mirror you are using, but the filenames will be the same.
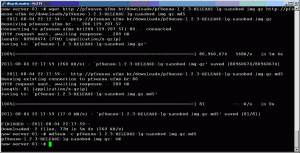
Once both files have downloaded, use md5sum -c to check the file for consistency against the provided md5 checksum as shown in the sample output below.
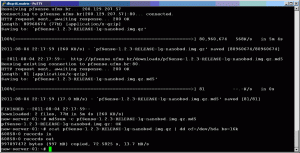
If the MD5 check returns OK then you are clear to proceed. If not, go back and re-download the file again. Make sure you downloaded the same file and md5 checksum. In order to burn it, we will use zcat to cat the zipped image out to the /dev entry mentioned earlier. My syntax will be zcat pfSense-1.2.3-RELEASE-1g-nanobsd.img.gz | dd of=/dev/hda bs=16khowever, if your flash cartridge shows up at another location other than /dev/hda, be sure that you change the command above to point to the proper device. Once the command completes, it should look like this:
Now that the image burn is done, shutdown the Linux box and pull your flash cartridge out and install it in the device that is going to run pfSense. Go ahead and connect it up but do not attach any network cables to the interfaces just yet. You will also need to connect the serial cable with a null modem adapter to the device to continue initial setup.
Initial Configuration and Setup
Now that we’ve burned the image, we are ready to do the initial setup. This entails doing some NIC probing to find the network adapters in the system and to assign them to their respective duties (WAN, LAN, Optional Interface 1, etc). You should only ever need to do this once as once the NICs are set up and the router is running, you can do everything including re-assign the interfaces from the web-based GUI.
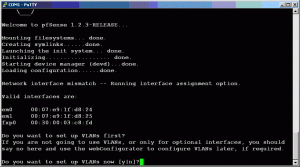
Open up PuTTY, Hypertrm or your favorite terminal application and set the serial port parameters to 9600 baud, no parity 8 data bits, 1 stop bit. Turn on the embedded device and after a moment, you should see some BSD boot stuff flash past. Wait until it prompts you to set up VLAN information as shown below:
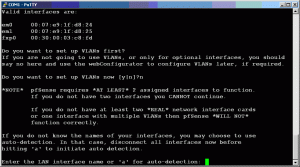
If you are lucky, you should see two interfaces, one for each NIC. If you have three network cards in your system, you will see three different interfaces. In the above screenshot, I have em0, em1 and fxp0. Since we will not use VLANs for our basic or our advanced configurations, we will answer “N” here.
Now, we will do some network probing to figure out exactly which NIC goes to which interface using the pocket switch and the patch cord. Don’t plug anything in yet.
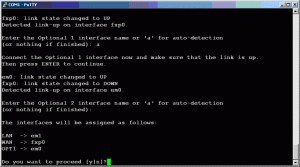
With nothing plugged into the network interfaces, hit a and hit enter. This will start the autodetection process. When prompted, attach the pocket switch to the interface you will use as the LAN interface and make sure that the LINK light on the switch and the NIC come on. Hit Enter and you should see a message where it detected the LAN interface link come up. It will then prompt you for the WAN interface. Hit a then enter again and move the patch cord to the WAN interface and hit enter. Repeat this process for the Optional interface (OPT1) or if your router only has two NICs, just hit enter. Refer to the below output.
Be sure that you only change the patch cord when it tells you to. If you disconnect the cable at the “hit A for autodetect” prompt, it may not detect link when it should. If you run into this issue, disconnect the patch cord and restart your router. Allow it to boot up and start over. Once you get done assigning interfaces, simply hit Enter to exit assignment. It will print the current assignments of the interfaces and ask you to validate. Answer Y if the displayed assignments are correct and hit Enter, otherwise hit N and start over or restart the device.
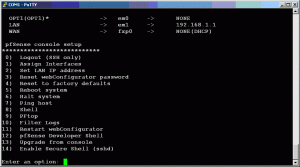
Assuming all went well, you will see it do a bunch of additional configuration. Once you get to the menu as shown below, you can then disconnect the serial cable and proceed with the configuration of the pfSense router.
Continuing the Configuration
Connect the pocket switch up to the LAN port of the router and connect your router’s WAN port to your Internet connection. Connect a computer to an unused port on the pocket switch and start it up. Once booted, you should have an IP address in the 192.168.1.x subnet and depending on whether or not your Internet connection is DHCP, you may already be able to surf.
Open a browser and go to http://192.168.1.1 and when prompted login with the username of admin and the password of pfsense. If all goes well, you should see a screen that looks like the one below.
Click “Next”
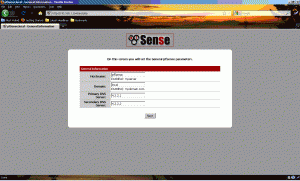
On this screen, you will set some basic network configuration parameters like the pfSense’s hostname, local domain and the two DNS servers. Use the ISP provided DNS servers here and click Next.
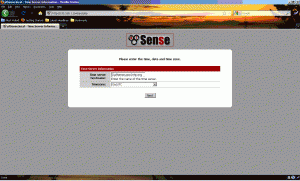
On this screen, we will set up the timeserver and the timezone of the firewall. Set the timezone where appropriate and then either use the provided time server or set your own. I left it default and have not noticed any issues with time reporting.
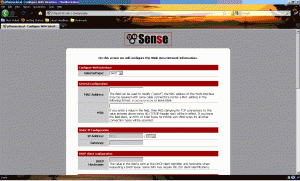
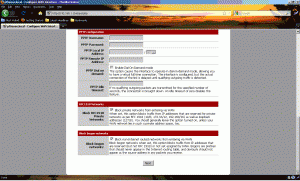
The next screen is where we will set up the WAN parameters. Start off with selecting which type of WAN link you have. Choices are DHCP (default), Static IP, PPPoE and PPTP. For each selection, there is a relevant section that must be completed. Since I use DHCP, I left it as default.
Pay special attention to the bottom two options. The first option “Block RFC1918 networks” prevents LAN IP addresses from the “private” networks from entering from the WAN interface. Private networks are 10.0.0.0/8, 172.16.0.0/12 and 192.168.0.0/16. Unless you are using this router inside another NAT environment, this option is best left turned on.
The other option “Block Bogon Networks” should be left enabled. This prevents non-routed and not-assigned networks from being routed against from your WAN interface. Since these addresses are not routed and not assigned, they should never contact your router anyways.
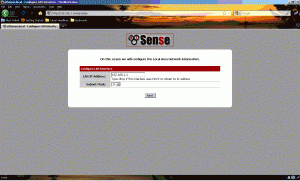
Now we are at the LAN configuration. This is where we can change the router’s internal IP address and subnet mask. Please note that most of pfSense uses CIDR notation, so you may want to get familiar with it or have a CIDR calculator at the ready. Tip: a /24 is the same as 255.255.255.0
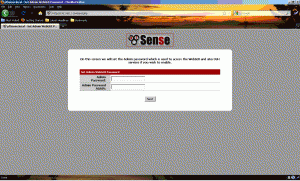
This screen allows us to change the default password of pfsense. I highly recommend changing it to something memorable. If you forget it, you can always reset it via a serial connection without resetting the router back to factory settings.
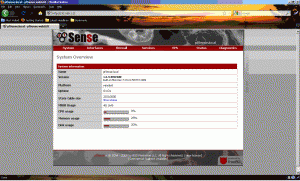
Finally we have reached the end of the wizard. Click “Reload” and wait a few minutes. During this time, the router will reboot itself to get adjusted into the new environment. Let the web page reload the router’s admin page and it should take you to a configuration page like the one below.
Once you are at this screen, you should be able to browse the Internet.
Some basic tips:
- Portforwarding can be set up under Firewall -> NAT and works pretty much like you would expect a Linksys box to work. Be sure to leave the “Auto Add a firewall rule to permit traffic through this NAT rule” at the bottom checked. This will create a matching rule on the WAN side to allow traffic along with the rule to bring the traffic from the WAN to your destination computer.
- You can see each interface’s status by going to Status -> Interfaces. If you are on a PPPoE or PPTP connection, you can disconnect and reconnect from this page. If you are using DHCP, you can also release and renew your IP here.
- If you run into trouble performing port forwarding, you can access the system firewall logs via Status -> System Logs. Be sure to turn on Logging on your rules so you can see new connections as they are being performed.
- If you’re having problems with a specific host, you can access a packet capture utility via Diagnostics -> Packet Capture
- If you want to diagnose upstream Internet connectivity issues, you can access Traceroute via Diagnostics -> Traceroute. and a ping utility via Diagnostics -> Ping
- Like numbers and graphs? Check out the system traffic graph (Status-> Traffic Graph) and the system RRD graph (Status -> RRD Graphs). You may need to install the Adobe SVG viewer to view these graphs.
- Unlike a Linksys box, it is recommended to halt the router before powering down and use the reboot function if a restart is needed. Both options appear under Diagnostics with the labels “Halt system” and “Reboot system” respectively.
What’s next?
Even in its basic configuration you already have a very powerful router on your hands. The sky’s the limit. The pfSense installation can support a great many different configurations and options so don’t think that you’re locked into a single configuration. Out of the box, pfSense has the software support for DHCP, DNS server, and other basic functionality as well as more things like CARP Failover, Open NTPD (Time server), OpenVPN, Remote Syslog, Traffic aggregation, and many other features that warrant exploration.
In a follow up article, I will explore setting up an advanced configuration, establishing a VLAN to isolate a wireless network from the wired network while still providing Internet access. This is a useful configuration for you that like to share your Internet access but don’t want to make your home network vulnerable.
Happy Hacking!
FIRESTORM_v1

November 18th, 2011 on 7:50 pm
what is a pocket switch?
November 24th, 2011 on 8:59 pm
Hello Earl:
A “pocket switch” is a common name for a small switch that is at or less than 5 ports. It is called so because the form factor is small enough to hide in your pocket and can be hacked into things needing multi-port networks in a small space.
FIRESTORM_v1
August 11th, 2012 on 3:07 am
its possible to install pfsense into router? i need to setup a hotspot server using pfsense runing on router etc TL-MR3420
August 23rd, 2012 on 11:30 pm
I’m going to have to go with “no”. Unlike DD-WRT and some of the other embedded hardware solutions, pfSense will only work on x86 machines. That being said, if you have an older x86 machine (like a Pentium III or better), pfSense will run like a champ.
Good luck!
FIRESTORM_v1
August 25th, 2013 on 12:58 pm
WOW a Cyrix CPU….I bought one back in 1995. It was a Pentium class CPU, but Windows (i think 95) would only recognize it as a 486. Those were the days when Intel and MS teamed up to squash CPU competition.
A blast from the past!
April 29th, 2014 on 12:08 pm
Great content. How do i use it for a cafe
July 20th, 2014 on 2:35 pm
Hello Ifeanyi:
I believe you are talking about a captive portal wireless connection that requires a user login and a password before a user can get out to the Internet. This configuration is very common in places like Hotels and coffee shops. I have never set up a captive portal using pfSense however there are many howtos and documents online about how to set them up. I would recommend that you split your network in two, one being your unrestricted access and another being your captive portal network. This way you don’t have to authenticate with the captive portal for all of your gear (credit card readers, point of sale terminals, etc..) and your equipment is safe from intrusions from the captive portal network. It may be something I go over in a future article.
Have fun!
FIRESTORM_v1
September 3rd, 2014 on 2:32 am
Hello, Thanks for the guide. Is it possible to configure pfsense on a computer with only one NIC (Network Interface Card). I would like to have more details on how to implement it in my Network
May 5th, 2017 on 4:25 am
when ever i enable captive portal in my pfsense it will disconnect me both from wan and lan, can you please help me out to stop people accessing my internet withou authentication