
In Part 1, I discussed the research, physical installation, a bit of maintenance, and the overall basic operation of the Generac 22kW Guardian whole home generator. In this post, we’ll go over the monitoring of the generator and quickly outline the vendor’s supplied option as well as the Open Source option I decided on, and even up contributing to! Yes, even though I’m not a developer, I managed to contribute to an Open Source project and helped the developer out!
But first…. incomplete?
As soon as the workorder was closed, I got an email from Generac stating that my generator was functionally operational but was missing a monitoring component. The component in question is a wireless module that’s designed to be plugged into the back of the generator and enables the use of the vendor supplied “MobileLink” phone app and website for monitoring.
I ordered the component (it was free, after all) and I received it in about a week. The installation instructions and the forethought put into the module’s installation were above what I expected, but they left out a significant detail about the module which would have saved time in trying to troubleshoot. Generac had a custom extension cable going from the controller board in the generator to a blank knockout that had the other end of the cable. The instructions were to remove the blank knockout, remove the cable end from inside the knockout, then plug it into the wifi module. Finally, reinstall the wifi module (it replaces the blank) and ensure the black gasket is tight around the perimeter of the module.
What made it hard for me was finding out after a bit of investigation was that the extension cable that was so thoughtfully provided had not been plugged into the controller. Once I plugged it into the controller, the wifi module lit up and started blinking like normal and the wireless installation continued.
Bad app design, or malicious design for subscriptions?
MobileLink on its face looks like a good thing. It’s an app on your phone that you can use to monitor the generator stats, get notifications, get emails for alerts and set up maintenance notifications, right?
Well… not exactly.
As I was setting up the generator’s monitoring, I came across a pop-up modal in the app that asked about a subscription plan. It offered three tiers of monitoring, basic (free), mid-tier, and premium monitoring ($99/yr).
To make matters worse, I couldn’t just select the basic tier or the mid-tier. The only option that was selected (and was selectable) was the premium tier. I was about to shred MobileLink in the reviews, but someone else pointed out how to select the free tier. You had to tap on the open area next to the words “free tier” then you could select the free tier monitoring! This is where I’m not convinced of the intent of the app, was it intentionally difficult to select the free tier, or was it just a mis-coded modal popup? Either way, it felt shady as heck to me.
Finally, with MobileLink set up, I quickly found out how basic the free tier was. It wouldn’t send notifications, it wouldn’t send emails, or anything really. At the basic tier, all I could do was confirm the generator was in Automatic Standby mode and get the state of the battery and the temperature.
So let me get this straight… I just bought a $13K generator, but now you’re gonna nickle-and-dime me on making sure it’s healthy.
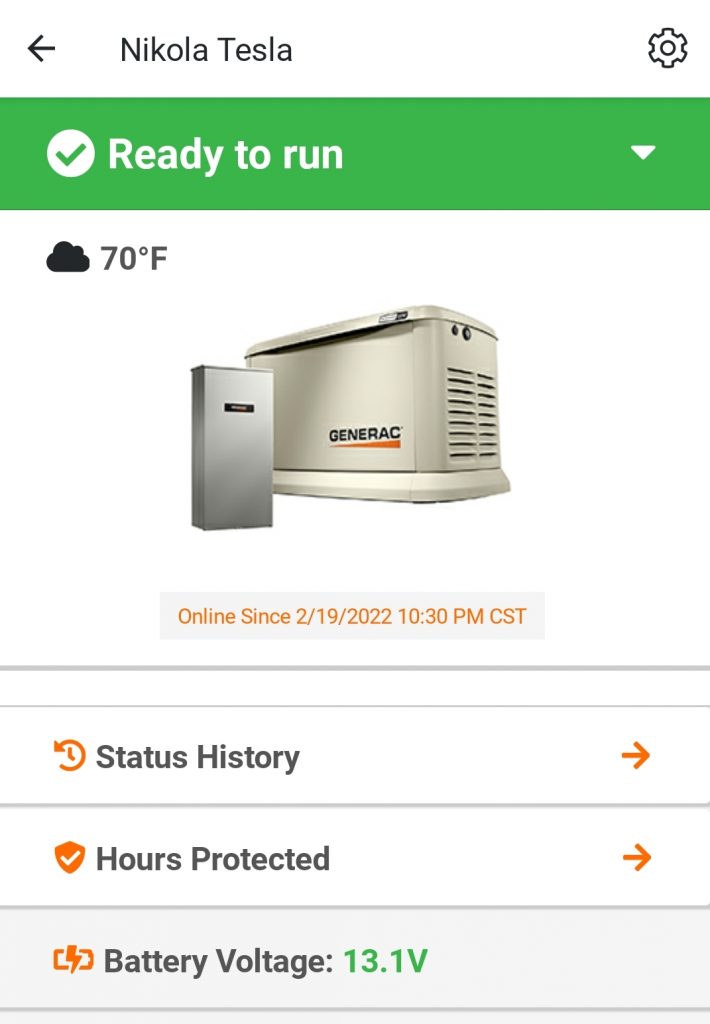
And yes, we named the generator “Nikola Tesla”. Suck it, Westinghouse!
Open Source to the rescue!
In part of my post-purchase but pre-install research, I came across GenMon, a free Open Source application suite for Generac generator monitoring! I immediately read up on it and I was sold; hook, line, and sinker. The documentation on GenMon is amazing and I was able to get it configured quickly. But before I went about installing GenMon, I had to first do some more work. Not just the installing the Raspberry Pi it would run on, but the trenching, the pulling, the cabling…. and the coding? But I’m not a developer!
The Longest Run… (Cat-6)
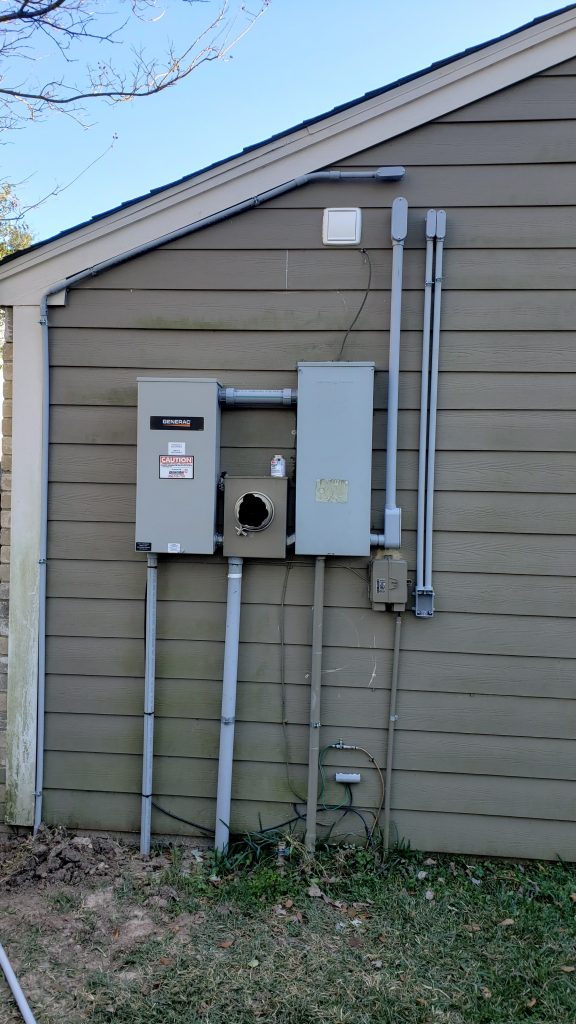
After running the MobileLink application and constantly seeing weak wifi and disconnects, I had fully decided on running a conduit from the attic to the generator back would be the most ideal way to get an Ethernet drop out to the generator housing. Fortunately, there was an unused blank on the back of the generator that would serve well for a flex conduit entry and the ground was already broken up from the larger conduits and gas line the installers had to dig up.
I had already planned on running a few more conduits and installing an exhaust fan for the bathrooms so it was trivial to add another conduit to the group. In the photo below, the conduit for the generator is the one on the far left, the two on the far right are for Cable Internet and upcoming fiber. The white box is the exhaust fan for the bathrooms.
Hardware Required
In order to use GenMon, you’ll need the following:
- A Raspberry Pi 3B+ or RPi 4 running the latest version of Raspbian.
- An appropriately sized SD card. I think I used a 32GB card.
- A case to hold the Raspberry Pi to mount in the generator housing (metal recommended for EMI shielding).
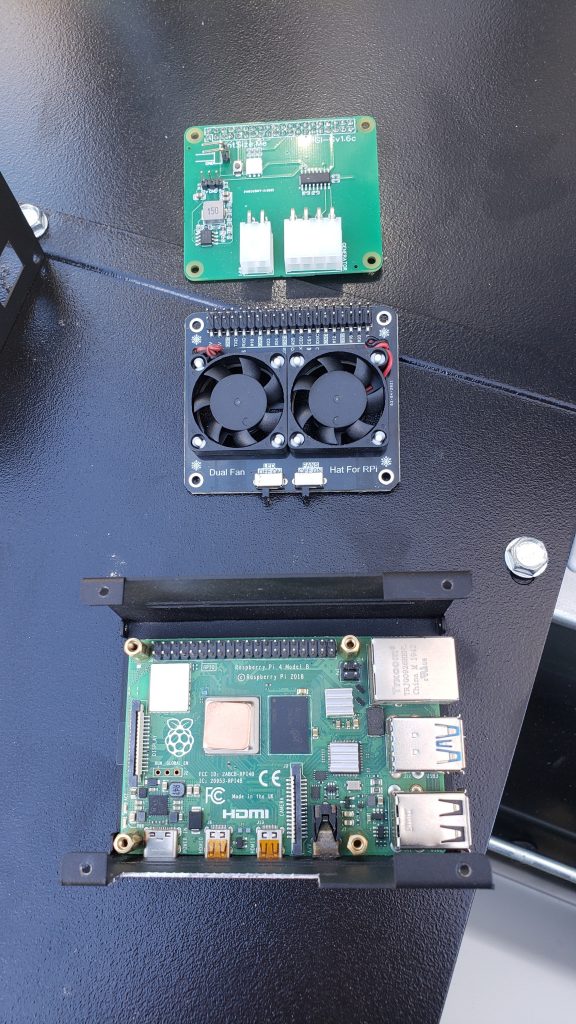
- An adapter cable (GenMon Wiki) or the Pintsize.me Generator HAT
In my implementation, I had a Raspberry 4-4GB given to me by a friend (Thank you ChrisG!) so that I could complete this project. I bought a metal case I found on Amazon, a Fan-Hat (which didn’t end up working out), and the Pintsize.Me Generator HAT with the 1ft cable.
The Pintsize.Me HAT also offers a few more benefits:
- The HAT has a second connector for the wifi module to pass it through to the controller. This means that you can use GenMon and the MobileLink app instead of having to give up one or the other.
- The cable ordered with the HAT also has terminals to attach the HAT to the starting battery. This means you don’t have to find a dedicated power supply for your Pi. I do recommend adding a 10A inline fuse, just in case to protect your Pi!
- The HAT also has a 12-16V to 5V buck/boost converter to ensure the Pi would have plenty of power. No low voltage dropouts or current issues with weak power supplies!
- The HAT also has a super bright tri-color LED that can be used to blink device statuses via GenMon plugins. Although I haven’t experimented with this yet, I plan to at some point soon.
Hardware Installation
Installing the hardware is pretty easy, thanks to the Pintsize.Me board and cable.
- Ensure you’ve completed the Serial Port Setup in the GenMon Wiki.
- Place the generator in OFF mode and open the output breaker.
- Remove the right hand side panel (two screws on top, one screw on right hand front facing corner.
- Disconnect the wifi module from the bottom of the controller.
- Attach the wifi module to the four pin connector (wires towards the four pin connector)
- Attach the – lead (black) of the Pintsize.Me cable to the – battery post.
- Attach the + lead (red) of the Pintsize.Me cable to the + battery post.
- Attach Ethernet to the Pi
- Plug the GEN side of the Pintsize.Me cable into the generator controller board.
- Plug the PI side of the Pintsize.Me cable into the Raspberry Pi. This will power on the Pi and cause it to start booting.
- Close up the generator’s side and front panels, secure all screws and make sure the Pi is out of the way.
- Close the generator output breaker.
- Place the generator in AUTO mode to return to standby readiness.
- Close the top and don’t forget to lock it up.
And now the pics of my setup!
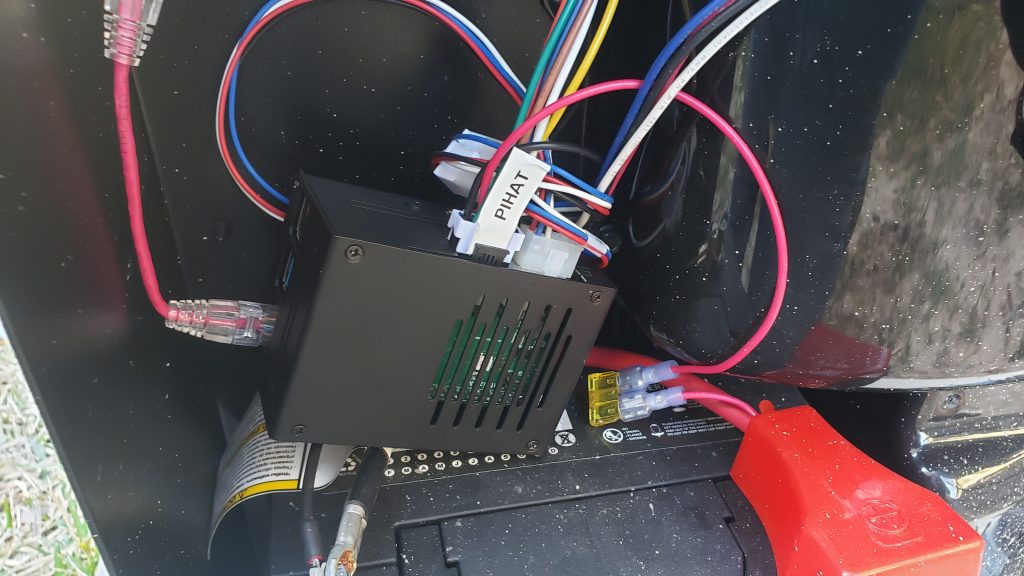
In this photo, you can see the Raspberry Pi in its little case sitting on top of the battery. The Pintsize.me cable runs from the Pi case to the back of the controller, and the red/white/blue/black wire for the OEM wifi adapter. The large blue cable with the ziptie is the CAT-6 cable I ran to the generator. It terminates inside the house at my patch panel.
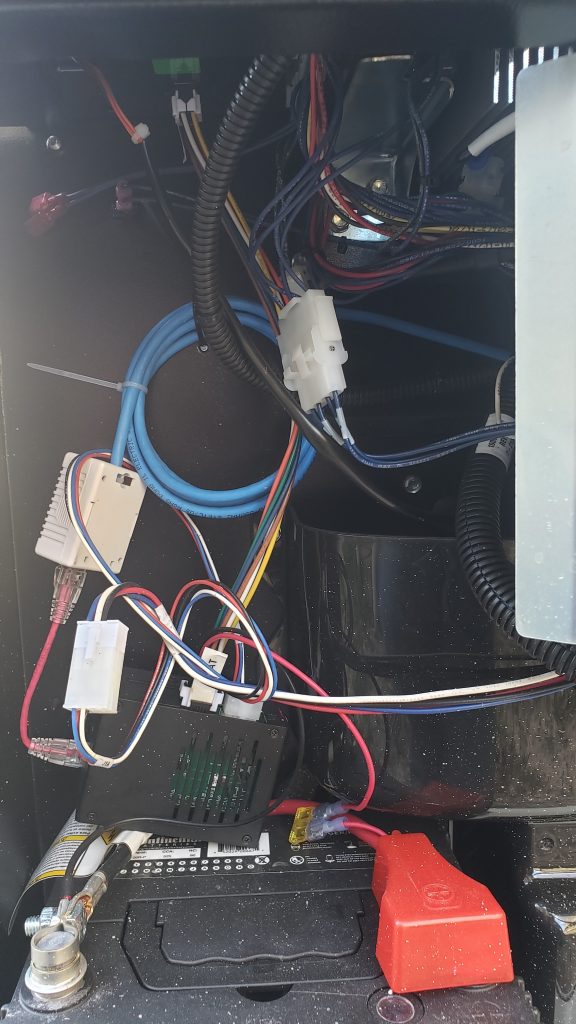
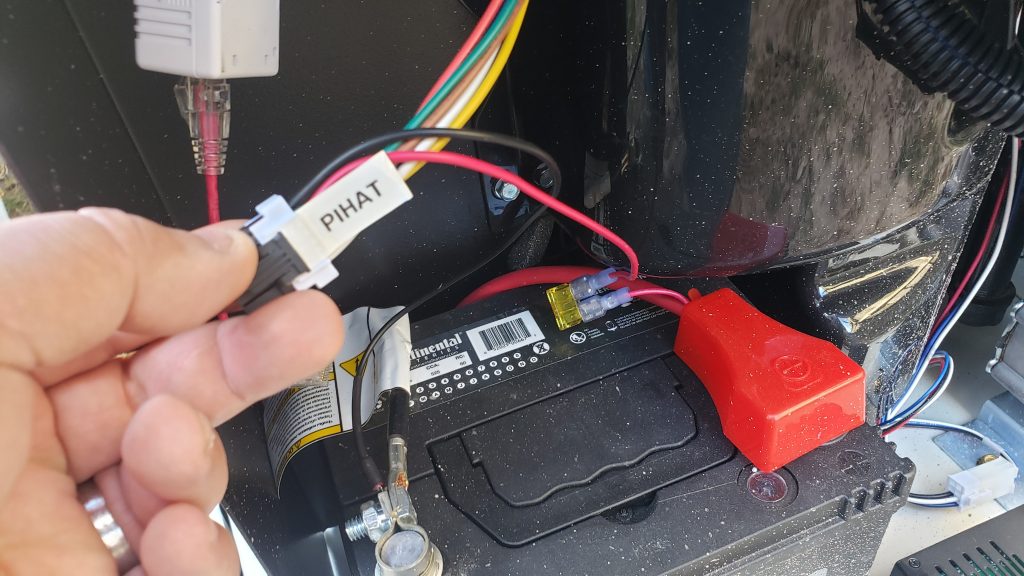
This is a closer closeup of the Raspberry Pi in its box. The cable marked PIHAT (left) is the Pintsize.me cable and provides battery power via the red and black wires. The rest of the wires in the cable are communication wires that go to the controller interface. The connector on the right is the OEM wifi module’s harness.
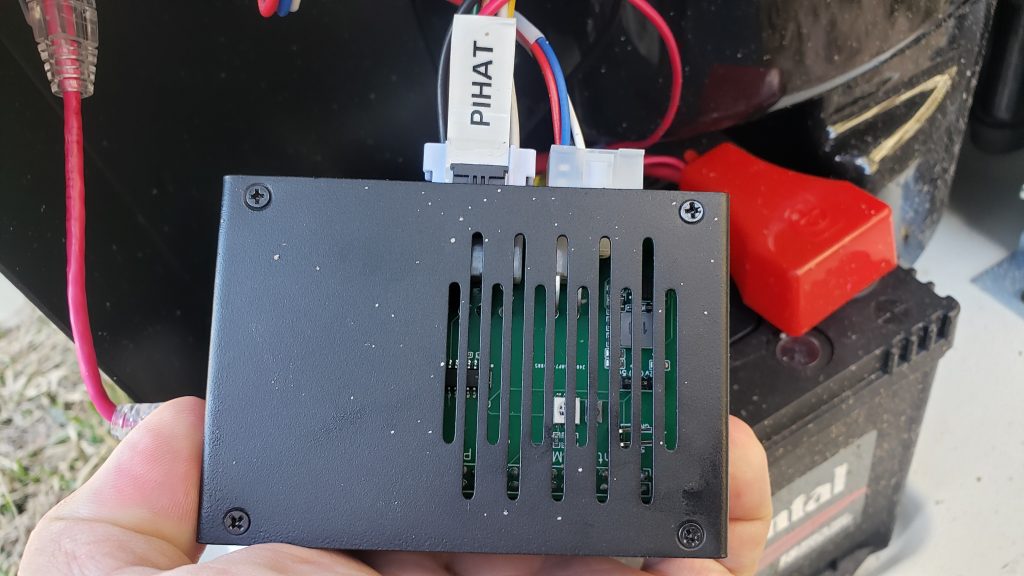
Another view of the PIHAT cable. The only critique of the PIHAT cable is the lack of fuse protection so I added a 10A fuse to the red wire which then connects to the + terminal of the battery. The black wire connects to the – terminal of the battery. Please fuse-protect your Pi!
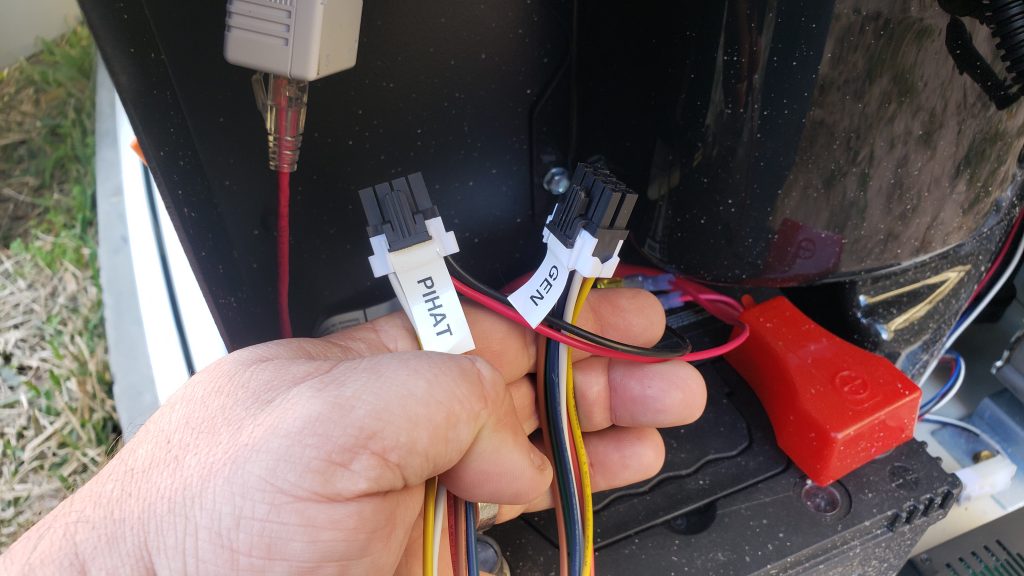
Both sides of the PIHAT cable. GEN goes to the controller, PIHAT goes to the 8 pin connector on the Pintsize.me interface board.
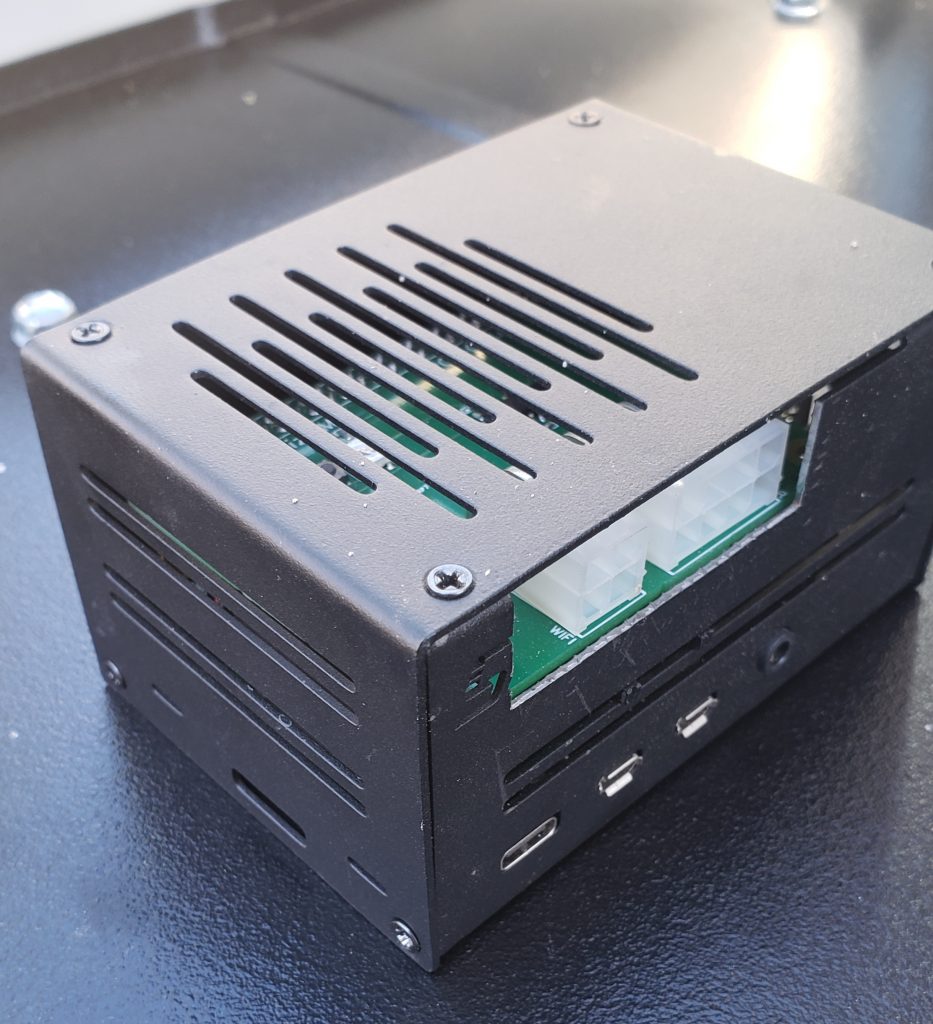
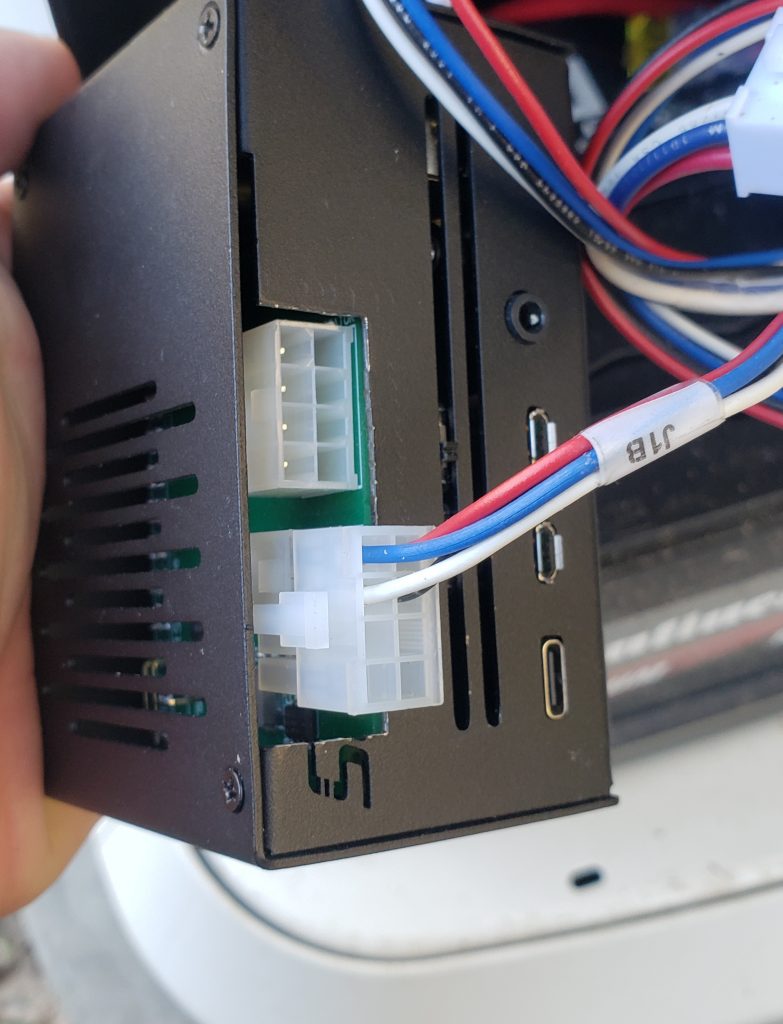
This is the metal box that I ordered for the RasPi. A metal box is recommended due to the EMI present while the generator is running. While I haven’t had a problem with EMI personally, there are others that have mentioned problems with the Pi and generator EMI causing a lot of communcations errors. I used a metal nibbler to make the hole for the two molex connectors. Remember, your four pin molex has to be able to accomodate 8 pins from the OEM cable if you still want to use MobileLink alongside GenMon.
The RasPi box with the top off and the Pintsize.me board exposed.
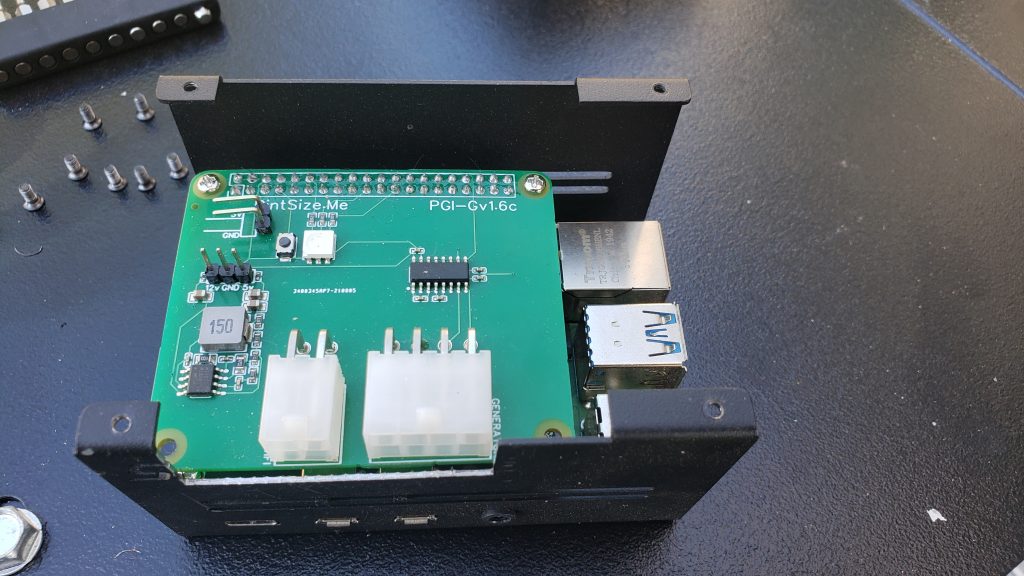
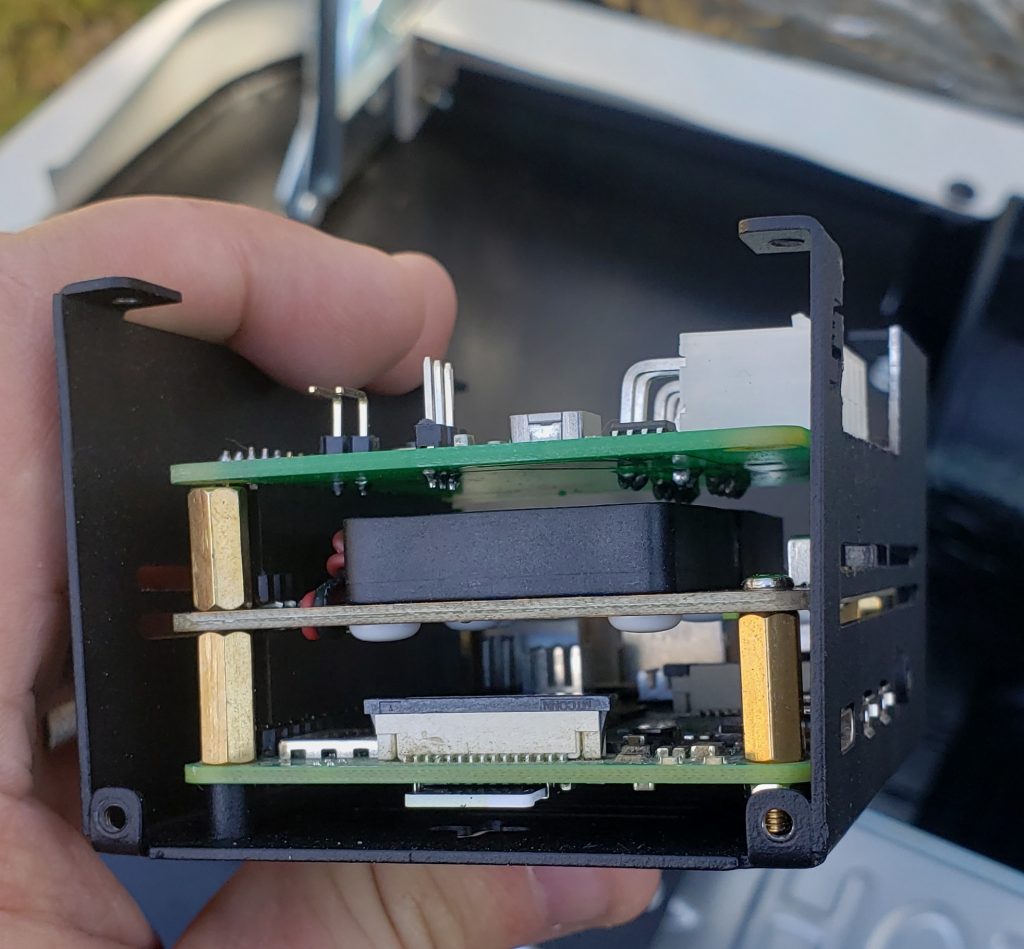
The “exploded view” of the RasPi case. At top is the Pintsize.me interface board, the middle is a fan board that didn’t end up working (but is also a pass through GPIO header extension), and the bottom is the RasPi mounted in the case. All three boards stack together and are secured using standoffs.
A quick side-profile view of the three boards mounted in the case.
The OEM Wifi module gets attached first, the end of the molex connector with the wires goes with the four pins on the molex connector on the board.
The eight pin connector gets the PIHAT end of the cable, while the GEN end of the cable plugs into the back of the controller. Look for a white 8 pin socket under the control panel facing down. Remember, once you attach the PIHAT cable to your Pi, it will start booting up.
Software Installation
Once booted and reachable on the network, you can finish up the GenMon installation instructions here: https://github.com/jgyates/genmon/wiki Essentially, you clone the repo using Git, then run the installation script.
Once you complete the installation, GenMon gets to work and stars polling data! It’ll auto-identify the generator and start populating data in its dashboard.

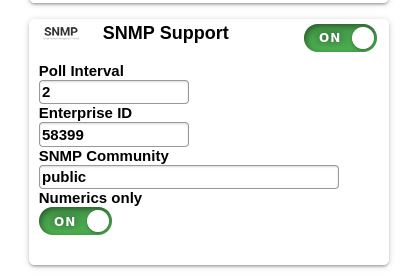
GenMon has a lot more information than just what’s listed here, this is just a quick setup walkthrough. First, let’s enable SNMP via Plugins on the left hand sidebar. Turn the module ON, then turn on “Numerics Only” (needed for Prometheus, more in Part III). Finally, click the SAVE button and you’ll be taken back to the main Status window.
Next, check the Settings sidebar menu and set the options specific for your generator. You’ll want to set the kW output, the fuel type, and the site name. The rest of the options, you’ll probably want to leave with defaults.

Monitoring Nirvana – Allllmost there!
GenMon is a fantastic application suite. I can monitor every aspect of the generator and I was in heaven… almost. One of the things that I really liked about GenMon, was that it had SNMP support out of the box, all I had to do was turn it on. Boy did that end up being a rabbit hole.
I’m a huge advocate for SNMP monitoring and it’s great when you have a MIB and a simple target and all was right in the world. Unfortunately, while GenMon had SNMP support, it didn’t have a MIB which left me poking at the OIDs and the source code until I found the ones I wanted. When I talked to the developer via email, they said that it was on the todo list, but they hadn’t gotten around to it so I took a leap of faith and offered to write the MIB, make it SMIv2 compliant, and get it all squared away.
I figured that if this person was kind enough to not only write a comprehensive monitoring solution for Generac generators, but also make it open source, the least I could do is write a compliant MIB for the project. That being said, do consider giving a tip to the creator of GenMon for making this possible!
I encouraged the developer to register an enterprise ID from IANA to avoid OID collision with other enterprises and they were willing to do so. With a week’s worth of spare time, I gave them a fleshed out MIB for GenMon that supported all the necessary OIDs one would be interested in monitoring.
Plugging into Nagios
I run a Nagios instance at home to monitor servers and various parts of infrastructure so once I had the MIB, I wrote a few service checks for it to poll GenMon and alert on various statuses. The checks from ERCOT I mentioned in this article are also present for this host.
Nagios + GenMon satisfies the immediate notification need, but what about historical and trending data?

More monitoring???
As good as Nagios is for “current-state” monitoring (e.g. it’s broken NOW), it is not very good at historical data (it broke a week ago). While I had originally been using Observium CE for historical graph data, it was completely unwilling to work with GenMon’s SNMP implementation. Not because of a failing in GenMon’s SNMP but rather Observium’s rigid and inflexible nature. Even with the newly minted and working MIB for GenMon, Observium still wouldn’t budge or discover any of the other OIDs that I wanted to monitor, but that’s a problem for another time (and article).
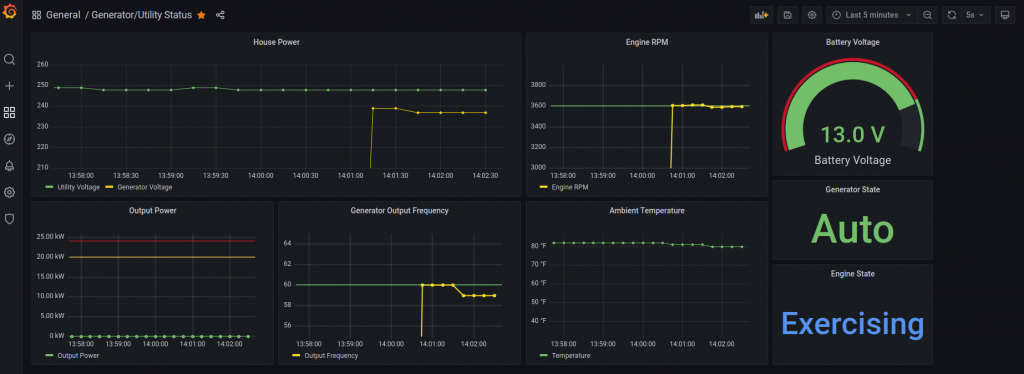
In the final part of this three part series, I’ll walk through installing Grafana, Prometheus, and SNMP Exporter. SNMP Exporter (and the GenMon MIB) will generate the configs to export to Prometheus, then Grafana will take that data from Prometheus and display it in pretty graphs and charts. To further entice you, this is what the generator dashboard looks like during an exercise cycle!
Onward to Part 3! Happy Hacking!
FIRESTORM_v1