Squirrelcage blower keeps small form factor PCs cool
by firestorm_v1 on Aug.14, 2010, under Embedded devices, Hardware, How-To's

As long as there has been electronics, there has been the problem of how to keep them cool. Unfortunately, the problem gets more complex the smaller that computers get and what works for one PC might not work for others. This is clearly the obstacle to overcome when trying to cool down a settop box. Read more to find out how I was able to pull it off very well for a little over $10 in parts and still maintain all my hair.
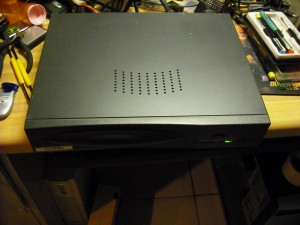
It’s pretty synonymous that computers == heat and with any mainstream processor, you have a pretty significantly sized heatsink and fan to keep the processor cool. While processor fans and heatsinks are pretty easy to come by for standard desktop computers and servers, embedded devices are pretty much left to their own devices (no pun intended). I was faced with the very same problem when I decided to start using two embedded computers to replace a NAT router and mini home server. These machines are sold as a “set-top-box” and were initially intended for some kind of Video On Demand service that used broadband service to deliver content. The computer hardware was figured out and working however left to the “stock” heatsink and heatspreader (there was no fan when I started) the box was very hot to the touch. I decided to initially tack a case fan to the heatsink to help with the cooling, but that only served to band-aid the problem.
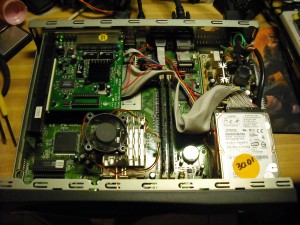
A view of the internals left very little room to work with. There was no way I was going to be able to use a standard computer case fan without some massive case modding. Since I wasn’t really looking for a reason to spend the entire day with the dremel cutting sheet steel, I decided to take a look at what I had to work with.
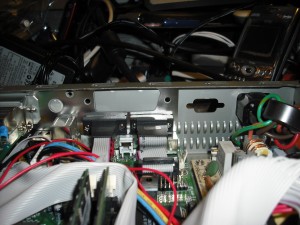
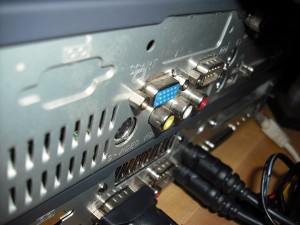
Since this thing was designed to be a set top box, there were all kinds of connections on the back, including a big SCART connector. According to wikipedia, SCART is primarily a European standard and is very commonplace for connecting AV equipment to TVs and etc. Since this settop was sold in the US, the SCART connector was unpopulated and instead left a knockout. This gave me a sizeable aperture for the hot exhaust, now to find some way to get the air moving.
In the above shot, the SCART port is the large dull steel colored rectangular hole in the silver backing. The hole is high enough that it does not interfere with the SDRAM sticks and far enough away from the power supply not to be a shock hazard. Now knowing what I had and how big of a fan I needed, I went to Microcenter and took a look around. They had a lot of normal desktop fans and a few oddball fans and the one that would work best ended up being an old-style squirrelcage fan. A squirrelcage fan is like the standard case fan that you’re used to however instead of normal blades, the squirrel cage fan uses an impeller that sucks in air from the front and exhausts it out of the side of the fan. The fan exhaust is perpendicular to the intake unlike a standard fan. The advantage is that a squirrel cage fan offers the airflow of a standard fan in a smaller form factor due to the perpendicular exhaust. The general idea is that the squirrel cage fan will suck in the warm air from inside the case and exhaust out of the now ex-SCART port.
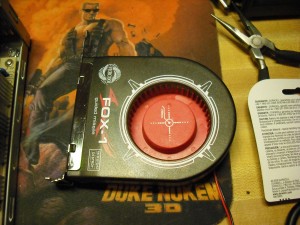
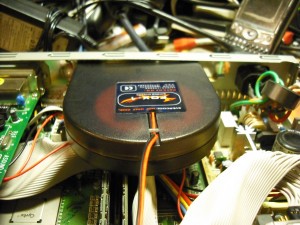
This is the squirrelcage fan that I selected. Although I couldn’t find a link on Microcenter’s website, here is a link of a comparable fan. It is a12V fan that is designed to screw into a removed expansion slot blank on a computer case. The fan connects via a 12VDC Molex connector and is designed to connect between the power cable and a hard drive or CDROM. Since there are no Molex connectors, I had to also get a three pin cable to connect to the motherboard. Thankfully Microcenter had a clearance on Intel OEM Processor fans and were selling just the connector for 25 cents.
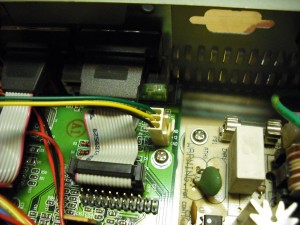
The Intel cable snaps perfectly into a convenient header that I found on the motherboard. This will be perfect as if I ever need to replace the squirrelcage fan, I can do so without having to cut up wires and desolder splices.
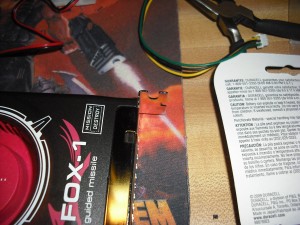
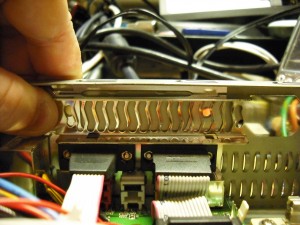
Now that I had the idea of generally where everything was to go, I had to make some modifications to the steel bracket on the blower. The blower was originally designed to fit in an empty expansion slot and the tab used for securing the blower to the chassis needed to be flattened.
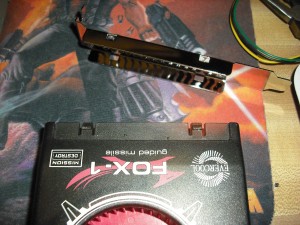
The bracket in question is so eloquently highlighted by none other than Duke Nukem. In order to modify the bracket without destroying the fan in the process, I decided to remove the bracket. In the above picture, you can see a notch that holds the fan in the bracket. There are four notches in total, two on each side. I used a couple of flat bladed screwdrivers and gently pried the bracket off.
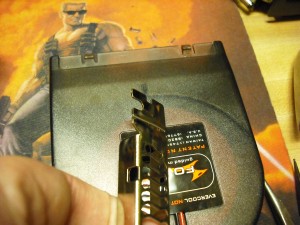
After a little bit of the creative application of force, I finally had the bracket flat enough so that it would not interfere with mounting. (Translation: I beat the crap out of it with a hammer.)
Now that the bracket is flattened enough, it’s time to see about how to go about lining it up with the SCART exhaust port.
I lucked out on this one. The two holes that were intended for the SCART interface hardware line up perfectly with two lines on the grill. This made mounting the bracket as easy as a couple of small nuts and bolts. Once mounted, it was time to start working on the power cable. I decided to use the yellow and black wires for the fan’s power because black is considered “ground” and yellow is considered the “+12V” lead in computer power supplies.
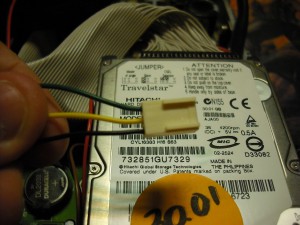
I cut off the green lead, and cut the cable about two inches long. I then wired the wires from the fan to the Intel cable. The red wire on the blower goes to the Yellow wire on the Intel cable and the two blacks go together. Not shown in this image is the small length of shrinkwrap used to secure and isolate the connection.
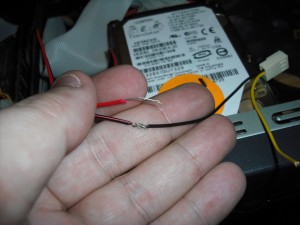
After soldering the first wire, I sealed it with the heatshrink and then soldered the other wire.
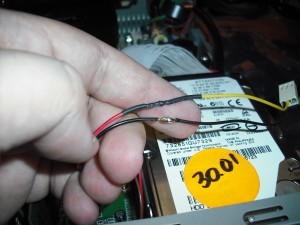
Another piece of heatshrink later and I have a ready to install cable.
With the cable now complete, all that remained was to plug the power cable into the power header and snap the blower back into the bracket.
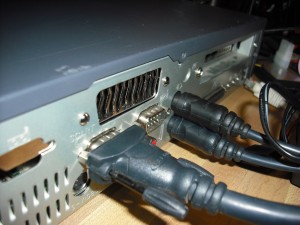
Here is a shot of the back of the case with the now operational blower.
And finally, here’s a side-by-side (or top and bottom) with an unmodified settop box.
Final Results
I’ve been running the settop now for the past couple of days and I can say that the blower is 100% effective. The case is cool to the touch and my fears of cooking the processor have been abated. The machine will do very nicely as a pfSense firewall as soon as I get around to finishing it up but for now, this is one less thing stopping me from using it.
If you ever find yourself in a similar situation where you have to get airflow but don’t have much space, I highly recommend these squirrelcage blowers. They’re cheap, they’re effective and well worth the time to install. Although I had to go a bit out of my way to install the blower, not having to worry about cooking the machine is well worth the effort.
I hope you enjoyed this article, it was definitely an interesting approach to cooling in a small form factor. Do you have any insight or other experience with odd cooling in a similar situation? Please leave a comment, I’m always interested in other people’s stories.
June 6th, 2012 on 9:01 am
Just curious about the noise level of this set up. I have several servers running in my work office. The noise level is significant & I want to get it down. I started looking for solutions & came across this very nice site (thanks). I recalled as a kid we used squirrel cage fans ‘because’ they moved a lot of air & they were quiet. Thought they might work on my servers….found your site.
June 6th, 2012 on 1:24 pm
Hello John:
It depends on your server’s configuration. I chose the squirrelcage fans for the same reasons as you, they are quiet, they move a lot of air and they fit in a compact space. For a server that generates a lot of heat, several squirrelcage fans may do the trick however be on the lookout for any shrouds that may direct air from a standard fan to a key component (processor, RAM, etc). You may be able to get away with replacing some of the standard fans in your server with squirrelcage fans at a significant reduction in noise. I know that on SuperMicro motherboards, you can set the fans to “4 Pin – Workstation” or “3 Pin – Workstation” for a good 2/3 drop in noise until it gets hot. Be sure to monitor your temperature for a few days before making it permanent to make sure that the fan swap doesn’t affect the operation of your server. Let me know how it went, feel free to send a link or pictures of your server when you get it modified.
Good luck!
FIRESTORM_v1