Everyone knows that in most if not all devices, batteries are considered a wear item, an item that’s designed to be replaced at certain intervals of a machine’s lifetime. (Ok, unless you’re Samsung… or Apple… or any one of a bunch of stupid laptop vendors) Enterprise level servers are no exception. What is outrageous though is these consumables are usually stupidly expensive and can be repaired for much less than the replacement part. In this case (and this post), I saved myself about $63 by building my own replacement battery pack for my HP SmartArray P400 raid card.
Before we begin…
The battery that was modified is a RAID controller RAM module backup. Most if not all of the fancy RAID controllers that come with Enterprise servers have a bit of RAM on them for disk cache. In the event of a power failure, this battery backup module keeps the RAM alive for some time until power can be restored and the cache written to disk. This has the advantage of being able to cache frequently accessed sectors from the disk array in RAM and then writing them to the array when it is able to and in doing so significantly speeds up the throughput of the array controller. It is very important to keep the RAM powered up in order to be able to save the write cache to the disks themselves, otherwise data corruption can result. Since this is my primary server at the house, I needed to get this fixed.
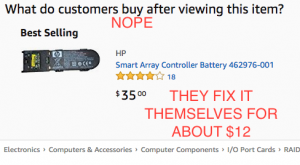
A quick search of HP’s Enterprise support page showed me that “new-old” stock would have cost me $75.00, Amazon showed me prices for $25-$45, but every one I looked at showed more “new-old” stock. New-Old stock is stock where it’s still shrinkwrapped, but it’s been around for quite a long time to the point where it’s no longer on sale. New-Old is a bit of a trap because you’re not sure how long it’s set on the shelf “-Old” but at least you know it’s never been used before “New”. With batteries, this is pretty much a non-starter as batteries of all types decay after a period of non-use and this battery pack is no exception. After closely examining the battery pack and lots of research on NiMH batteries, I found I could do this for about $12 and maybe an hour of effort (and taking photos along the way).
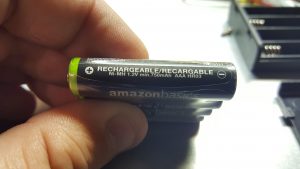
Two points that must be mentioned. 1) The battery backup pack has a small charge controller with it. This keeps the NiMH batteries conditioned and charged for if/when power fails. It is important that we use NiMH batteries that are compatible but do not exceed the controller’s recharge capacity. 2) Unlike Alkaline and NiCad batteries, NiMH batteries put out 1.2V instead of 1.5V. In order to get the 4.8V rating on the battery backup, we’ll need four NiMH batteries (4 x 1.2 = 4.8).
Parts Needed:
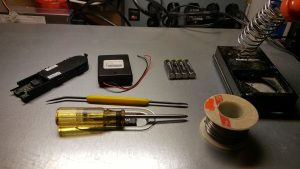
In order to do this modification, you will need the following items.
- A soldering iron and some flux
- A metal spudger or thin screwdriver (for prying)
- Wirecutters
- Glue Gun
- Beer
- 4x AAA NiMH batteries (AmazonBasics batteries are $8.49)
- A 4xAAA battery holder (Mine has a switch, the switch is optional)
- Phillips screwdriver (if your battery holder requires a screwdriver to get it open (optional)
NOTE: You MUST use NiMH batteries. Using alkaline, NiCad, or Lithium Ion batteries will damage the RAID card and possibly the server itself.
Symptoms:
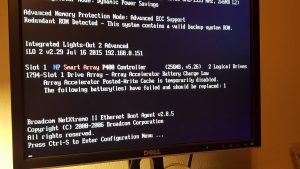
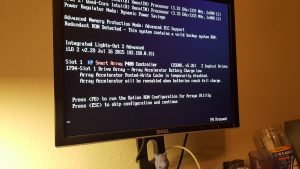
If you reboot your server and you get a message like the one above, it’s a fair sign that your battery is toast.
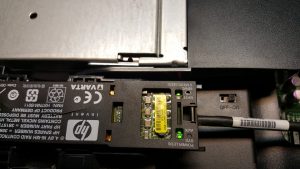
If you fire up your server without the lid and you see the amber LED on the battery pack light up, this is a definite sign that the pack is dead and in need of refurbishment.
Breaking a few eggs
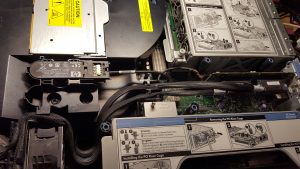
If your server’s in a rack, you will more than likely want to un-rack it and take it to a desk. If you want to leave it in the rack, that’s up to you, but be careful un-racking it. Damn thing’s heavy.
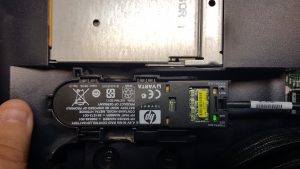
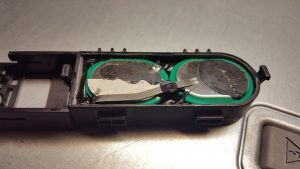
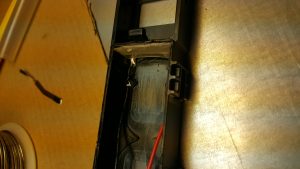
Take the top of the server off and you’ll see the RAID battery backup.
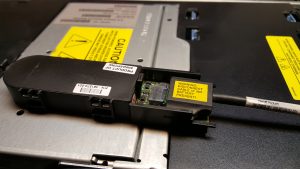
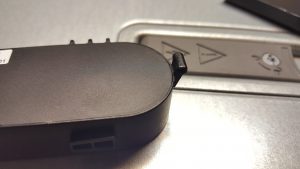
Power down the server (if it’s not already down) and turn the battery pack over. Disconnect the flat black connector from the controller PCB
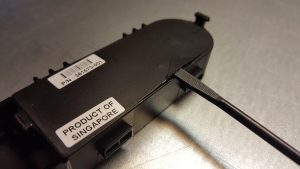
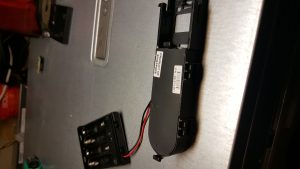
Examine the battery module top and make sure it matches. (Even if the part number doesn’t match, you should still be able to follow along, just make sure the battery chemistry and the contacts match)
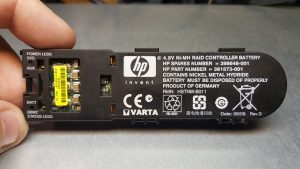
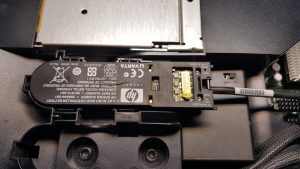
Examine the bottom of the battery module and identify where the red “+” is (top center of below photo). This will be important later when we wire up the battery pack.
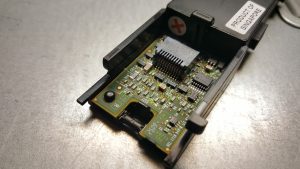
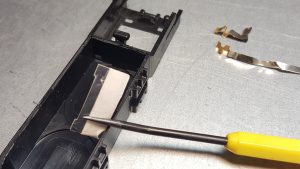
Now, remove the charge controller. We will need to reuse this. There is a spring loaded plastic tab in the middle of the “U” shape of the PCB. Pop that tab (but do not break it), gently remove the charge controller and set it aside.
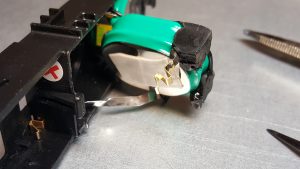
At the bottom of the charge controller PCB, there are two gold pads that mate up with two gold strips of metal. We will need to solder to those gold strips without damaging them (much). Around the perimeter of the bottom of the battery pack (side with no writing) there is a plastic cap glued to the battery.
Use the spudger to try and work the plastic cap off. Be careful to not pierce or short the batteries. The controller may think the batteries are dead, but that doesn’t always mean that they don’t have a residual charge to them.
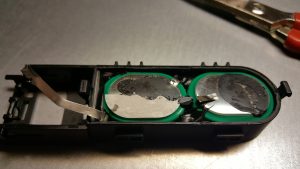
Once the plastic cap is removed, you should see two green shrinkwrapped battery packs.
Cut the small metal strip that is visible. This is the negative lead and we’ll need to solder to it later.
Use the spudger to gently remove the batteries. Bonus points if you don’t rip up the contacts in doing so.
Once you have the batteries removed from the casing, trim off the contacts. You want to leave as much as possible to work with later.
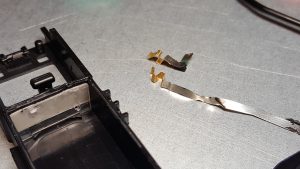
In the above image, there is a piece of clear plastic that acts as a retainer. You’ll want to pull that out too to reinstall the clips.
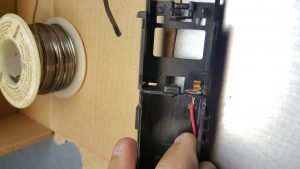
Prep the positive contact and solder it to the red wire on the battery holder.

Place the soldered lead so that the square part is even with the wall where the plastic retainer was. Only the angled part should protrude. This ensures there’s spring tension for the connector when we put the charge controller back in the module.
Tack it down with hot glue to hold it in place.
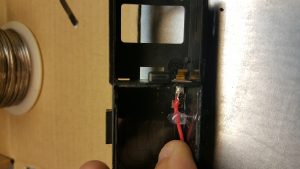
Do the same for the negative wire (black). Trim the silver metal part of the contact down to what you need. Too much excess could cause a short. Below, I’ve got both leads tacked down.
Reinstall the sticky retainer and make sure the contacts stay in place.
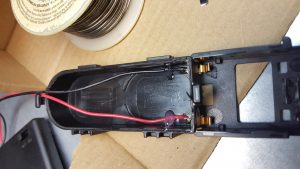
Next, you’ll want to cut a small groove in the wall to allow the wires to run out. I would also recommend “potting” a part of the hole where the batteries were to provide a strain relief. The middle section of the holder was layered with hot glue to provide a strain relief in case the battery pack was yanked on.
If you left the plastic cap intact, go ahead and reattach it and glue it into place.
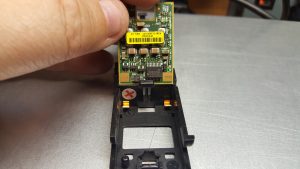
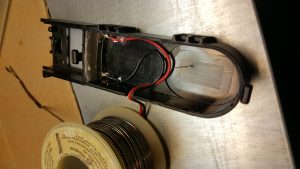
Reinstall the charge controller board into the battery module and put the 4 AAA batteries into the battery holder. Reinstall the whole unit into the server. In my server, the 4xAAA battery pack fit under the SAS cables running to the front of the machine. If your battery holder has a switch, make sure it’s turned on.
Go ahead and connect power to the server and turn it on. Despite the fact that the photo below makes it look like the amber battery fault light is lit, it is not. The BBWC STATUS LED may blink. This is fine.
Watch the server’s console while the machine boots. Depending on how fresh the batteries are, you may get a warning that looks a lot like the one before. This time, it says the cache is temporarily disabled because the battery is charging.
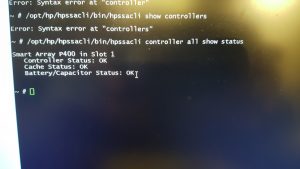
Leave the server running for at last 12 hours continuously. You can then reboot the server and see if the charging message shows up, or you can use one of HP’s command line utilities to check on the battery backup pack. In this case, the server was left running overnight and was checked the morning after. Getting all OKs from the command line application tells me the cache is available and the array controller performance is back up to spec.
In the future, if you get the dreaded “Replace Battery” warning message, now you can order more Amazon NiMH batteries at $8/set versus HP’s idea of a replacement battery pack at $75/set. Now that you can easily replace your RAID controller’s batteries, pop open a cold one, you just saved yourself $63!
Happy hacking!
FIRESTORM_v1